Saturday, March 30, 2013

Christina's Quilt

A friend of mine just had her 40th birthday, and my gift to her was a lap quilt. I asked her what colors she wanted in it, and she said black and pink. Pink!

As far back as I can remember, I have hated the color pink. So unlike any other color, pink did not exist in my fabric stash. As a result, I had to hit the fabric stores for the first time in ages. Turns out, there is a shade of pink that didn't make me want to vomit. In fact, I thought it was even....pretty. I just don't know who I am anymore.

I farted around with patterns for awhile, and ultimately decided to just do simple alternating squares and add some free-motion quilting to jazz it up. Which meant getting some pink thread. I am so unaccustomed to having anything pink that I actually felt self-conscious purchasing pink fabric and thread....like I was trying to pull off some disguise. It was odd.

Anyway, thanks to insomnia, I was able to finish the lap quilt in about two days. Two nights, technically. And I actually love the way it turned out:


That's it. No words of wisdom or thrilling anecdotes. I'm still on my first cup of coffee and feeling rather bland. 


Thursday, March 21, 2013

Wool Quilt

I just realized that I haven't posted the picture of the wool quilt that I made. I think it was in 2010. As I mentioned before, I was first inspired to quilt because of a friend's wool quilt, so it's always been on my mind to make one myself. I didn't do nearly as well as she did.

It's about 6' x 6' of wooly warmth. Since wool is gigantically expensive (unless you happen to have a flock of sheep, which sadly, I don't), I collected my wool by going to Value Village and buying wool clothing. I honestly can't remember where the grey and purple wool came from, but the red was from a skirt that was actually damn cute. Since it was two sizes too small, I was happy to take my weight-gain angst out on it and cut it to pieces.

I used flannel as the batting and for the underside of the quilt, I used another piece of wool that I had hanging around. It's ugly, but I had a lot of it. For the binding, I used black flannel in case the edges touched my face. Wool makes me itch.

The finished product wasn't horrible. Honestly, working with wool was harder than I thought it would be. My machine balked a lot. And I used cotton thread which was stupid considering how heavy wool is and how much abuse the seams take. So naturally, it's coming apart in places.

Still, while the picture makes it look like it's unruly and won't lay flat, that's just me being lazy. I had recently washed it and it was all frumpy-looking from the gentle cycle on my washer. And I wanted to take a pic for the blog and move on to the new quilt I'm making. And since I think I have one reader of this blog (me), I decided to not care a whit how the pic came out. Yes, I used the word "whit."

As far as functionality goes, this puppy is warm and heavy. If you like those things, which I do. Last night I actually put it over an electric blanket and heated every cell in my body to a boiling point. Lovely.


Thursday, February 28, 2013

"Wisdom" Owl quiltlette

 9.5" x 9.5"
 
This owl art quilt is one I did for my friend, Misha. The owl has some significance between her and her husband, and I've always been partial to them myself. So I guess this could be a late wedding present for them, but I'm just using that as an excuse. I would have done it anyway. 
 
As usual, I started with a drawing of what I wanted to do. I rough sketched in the quilting lines I thought might work. Then I drew it again on the fabric:


I decided to try cutting out the purple fabric to reveal the yellow and green fabric I had placed below, but it didn't work out so well. I used a X-acto knife to cut the fabric that had been stabilized with heat bond interfacing, but my X-acto wasn't very exact-o, and left some jagged edges. As usual, I work with what I have and figured I'd deal with those rough edges later on in the quilting process. 


One the photo above, I free motion quilted the lines of the owl, and the feathers. The eyes kind of sucked. They looked much better in the ink sketch than they did when quilted. So once again, I fudged around with it until I found a way to make it bug me less:


So the eyes are better now. I used yellow Jacquard textile paint to paint over the eyes to tone down the thread work (although the thread work now gives it some dimension, which I like) and it also made the light bounce off of the eyes a little more, which for an owl pic, is a good thing. I toned down the pupils by painting them black and added a dot of white in each because prior to doing that, the owl looked seriously pissed off.
 
I also added some metallic copper paint to outline the owl to make him pop a little more from the background. I also highlighted a few feathers with silver metallic paint for the same reason.


I finished up by quilting all of the little chucks of owl I had sectioned off, although once again, it's difficult to see in these pics. I also hand sewed some metallic silver thread to accentuate the feathers and part of his face. I took the above pic at an angle to show a little bit of the reflective qualities of this guy. I really need to work on my photography skills though, because so much is lost in translation.
 
 
Here's a closer view of the thread work on his face. 


And this shot is just to show how the reflective paint helps to make the owl glow from a distance. 


And here's the little guy bound and ready to deliver. I haven't seen Misha in awhile, and I miss her. One of the things that I love about making a fabric piece for someone is that the whole time I am working on it, I am thinking of that person. It helps to make someone who is far away seem close.

I have, however, encountered the problem of starting out making something for someone and then falling in love with it and not wanting to let it go. This happened to me with the Zombie quilt I did. I have to get past that. It wasn't an issue when I was doing bed quilts, but for some reason, the art quilts just give me an attachment disorder. Maybe because they're impossible to reproduce in a way that bed quilts aren't? I dunno. I am interested in selling my stuff at upcoming art fairs and the like, so I suppose I'd better get over it.

Also, I have no idea how to much to ask for these pieces. You can't use a traditional calculation of a per hour formula because there is way too much time spent on them to make that feasible. I think perhaps I just have to come up with a figure that allows me to be able to feel good about parting with the piece, while still keeping it affordable enough for people to be interested in buying. I wish I could just create and have someone else sell.

Wednesday, February 13, 2013

"A Zombie in Springtime"


 IF YOU'D LIKE TO SKIP THE WORDY BITS AND JUST SEE THE FINISHED PROJECT, SCROLL TO THE END.


Okay, I am back and buzzing on prednisone! Instead of making me insane, this time, it is actually helping. Helping! For the first time in about a year, my sense of smell has come back for visits. I was making the Zombie quilt (yeah, yeah, I'll get to it), and suddenly I could smell! In a fit of excitement, I ran around the house searching for things to sniff. I sniffed everything I could think of...from rubber bands, to fish food to, of course, chocolate. It only lasted a little over an hour, but it was divine. And tonight? It came back again for another hour. I'm hugely excited about this because, not only are scents remarkably cool and under appreciated things, this means that my olfactory nerves are not dead after all. They have just been lying dormant under a year's worth of sinus goo.

So, I'm manic happy. While buzzing from my scenting high, I decided to tackle a piece that I wasn't sure I was going to pull off, and not only did I pull it off, I got it done in less than 24 hours. Insomnia can be so cool that way.

I decided after my last few pictorial pieces, that I wanted to go outside of my comfort zone again. My normal plan of attack for these fabricky pieces is as follows:

  1. I find a clear photo (or part of a photo) that I like.
  2. I turn it into a line drawing, if I can (some things just don't want to lose dimension easily).
  3. I take the line drawing and try to transfer it (with ink or pencil) onto the main piece of fabric I want to use. Again, not always successful.
  4. I then begin free motion quilting to "draw" the same line drawing onto the fabric with thread. This is where it gets tricky: Fabric can bunch, sewing machines, needles, thread and bobbins can have little fits of rebellion. I also have to manage the foot/hand/eye coordination that goes along with proper foot peddle speed and the speed of my hand pushing the fabric, twisting and turning. So again, doesn't always work out, but at this point, I've invested some time into the piece, so mistakes are a bit annoying. But if it's not going to work out, I usually know it by at least this point. I lament. I move on to something else.
  5. If it's made it this far, it's time to bring out the colored pencils.
  6. If it wants more, I will add fabric paint.
  7. Now it's anything goes and I add a bit and futz around and by this point it's morphed into whatever it going to be, more or less. I'm just fooling around with finishing touches.
On my previous pieces, I chose things with simple lines. Girl With a Pearl Earring, Gone But Not Forgotten, 
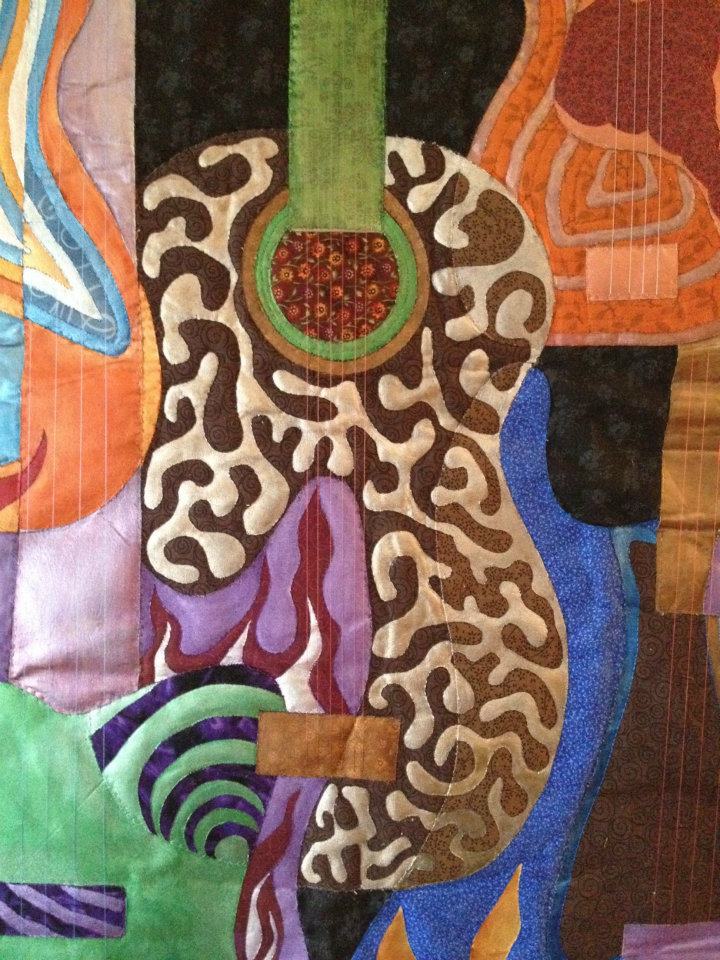
Copperhead, and even the Guitar Quilt all had pretty simple lines for me to free motion quilt. But I wanted to do something that was more detailed with the free motion quilting. Looking for inspiration, I came across an image I had saved a while ago of a zombie head shot. It was pretty gruesome, so already out of my normal comfort zone, but captivating none the less. I am still looking around for the original artist, so if anyone sees anything familiar in it, let me know so I can flatter them and hopefully make them happy they gave me the idea instead of making them regret the internet. This is the original image:


And here is the line drawing (just paper and a Micron pen) that I made of it. I realize it's a crappy shot, but I'm moving on anyway.


And here it is with only the ink on the fabric:


I like how the fabric already gives the illusion of veins (you know, if you squint and are on prednisone), but since it was on the dark side, I still used the Micron pen for drawing on the fabric, and added in a Sharpie as well. I needed to remind myself of where I needed the thick thread spots to be, and what I was planning on doing with the colored pencils (so I wouldn't accidentally sew those spots).


At this point, I'm feeling pretty happy. That is a huge amount of thread playing around in there, and I didn't really have many mistakes as I was quilting it. (I should mention that on this particular piece, I didn't want the thread to show up on the backside of my finished piece, so I am only quilting the top and the batting underneath, with no backside attached yet).

Now the colored pencils come out. This is one of my favorite parts. It's very meditative...It's too bad we stopped using coloring books as adults. It's also a very forgiving part of the process. Since I want to layer color anyway, I can start with (almost) any colored pencil I want, just to set a foundation. If I don't like it, I blend it away with something else. I am now relaxing at my table, watching Dr. Who on my lap top, and just whiling away the hours with my pencils and the image.

First thing I did was to differentiate between the open mouth (and rippy holes that peek into it), so I put the base down for that first:


 And so on:


I have to be honest. At this stage in the coloring...he's starting to give me the willies. When you are working on a piece, close up, for a long time, you'll get a sort of camera flash after effect...the image stays in your vision when you close your eyes. Like I said, it's outside of my comfort zone, but I call out of bounds when he's still there when I blink!

Solving this problem actually brought a whole new level of enjoyment to the piece for me. After talking to the future husband, we both agreed that cutting him out and sewing him into a different fabric would be better. The overall effect was just a little too dark for me. Literally and figuratively. So I went on a hunt through my fabric stash to try and find something that would work. I didn't find anything until I hit my long unused stash of novelty fabric. That's when it occurred to me that this piece could go in a whole different direction.

And here it is...the finished project:


I went from hating to look at this piece to loving it! Instead of seeming to be a sinister threat to the viewer, he suddenly looks annoyed as all hell by the butterflies. So the title "A Zombie in Springtime" was born. He makes me laugh. I love him.

Before I sign out, I just want to add that I decided not to add a border to him. I would have preferred to, honestly, but nothing worked. Everything distracted from the overall effect of a zombie surprised to be caught up in a butterfly migration.

Although you can't really tell from the picture, he has a bit of a 3D thing going on. Under the head is a layer of batting, then the bottom fabric, then more batting, then the backing fabric. I just used the inside out method of binding him, so as a bonus, I didn't have to cut any strips or buy any pre-made stuff.


(Consider this pic to be an outtake from the blog. It's just a shot showing the progress of cutting him out of the purple fabric and seeing how he works with the butterflies. If he looks a bit soggy, he is. After I color/paint, I use a textile medium to fix the colors, but I have a hard time doing nothing while I wait for him to dry.)

Sunday, February 10, 2013

Oh happy day: Return of the Snail's Trail

First, here's a pic of the lap quilt that I completed simply because I hate not finishing things.

 
I realize it looks uneven. It's not, apparently the photographer was. This quilt was made from some fabric my Pops got me. Much brighter and bolder than I was used to, but I am discovering that trying things outside of my comfort zone is generally rewarding. The only new thing I did on this lap quilt is to use premade quilt binding. I used Double Fold Bias tape, because I really HATE cutting fabric. I know it goes with the territory but it makes me nutty with boredom. So the bias tape for the binding helped my sanity a lot. Expensive, but how much should one spend on mental health? ;)

So on to the Snail's Trail. I posted a while ago HERE about a snail's trail sampler I did. I call it "Grasping Hands" and I love the pattern. It's one of my favorites. But for someone who hates precise measurements and precise cutting, it's a nightmare. So I had resigned myself to not having a bed quilt with that pattern. However, my BFF Misha is willing to do the top for me, and I will do the quilting and the binding. I'm pretty thrilled about this, because not only will I get the pattern I want for my bed, but I will also be getting a quilt top made by one of my favorite peeps.

In other news, I have compacted/impacted/ferociously unhappy sinuses. It has been causing a world of "ew" and "ow" in my life lately...the root cause of which is allergies that are more like tiny armies that have defected and are attacking the home base. A CT Scan revealed that all of my sinuses are packed tight. The end result of this is that I am on prednisone. Prednisone normally makes me evil beyond belief. So far I'm doing okay...I think it's because of the amazing relief I am feeling for being able to breathe without feeling like I am inhaling mud for the first time in ages.

So I'm now motivated to do some quilting. For one thing, I have energy and for another, if a mood swing hits, I'd rather take it out on my fabric than my fiance. I've got a few art quilts in mind, some of which are outside my normal realm...but I'm learning that can be cool. Feels good to stretch the mental limbs now and again.

Monday, February 4, 2013

Self Portrait: "Copperhead"

And finally, I am caught up. We're at the point where we are out of the past and into the present. This is a piece, roughly 7x10", that I call "Copperhead." It is a self-portrait, but it is based off of a picture taken when I was about 25. Some people are saying I still look like this, and I love them for their bald-faced lies.

Again, thread outlines, pencils for the main color and paint on the background. I highlighted the hair with metallic copper thread after coloring with the pencils, but the quilting on the background (the spirals and loopdey-loops) were done prior to painting. If I could do it over again, I think I'd do the quilting post-painting as the definition kind of got lost. I wound up highlighting it a little bit with some colored pencils, but I'm not sure I like the results. Oh well. It is what it is.


Now I'm to the point where I need to come up with a background, or frame, fabric. I was thinking about the stuff shown below.

I wasn't originally going to go with purple, but I just happened to set it down on some fabric I was ironing and I kind of like it. I'll get back to you when it's done. And now that the blog is up to date, I have no excuse for keeping the sewing machine off. Ciao, babies!

My Happy Place: New Sewing Room

Last march, my future husband and I bought a house in an area I have always wanted to live: Webster Groves. The house was newer than I like to look at, but as much as I love old houses, I hate paying for their upkeep. This place was a happy medium.

It has two bedrooms, which we used for us and my son, Eben. Eben ultimately wound up moving back up to Cape Cod for a couple of years. (Reminder to self: Amber, this is a crafty blog...do not spiral into the "I really miss my kid" posts. Don't do it.)

Me and my spawn


While Eben was here, my sewing room wound up in the (mostly) finished basement. There's a little room off the main part of the basement, next to the bar and the pool table, that I cleaned up and painted and made the best of.

Eben was squawking that he wanted that room, and I can understand that...I was a 13 year old once, too. Dark, quiet...lots of privacy, and wonderful distance away from the parent's room. Even has small windows perfect for sneaking friends in and you out. But as the basement was mostly the Man Cave for my fiance, I thought it best to keep my son's oh-so-innocent ears away from the manly sounds that sometimes happen down there.

As it turned out, I didn't use the sewing room that much while it was down there. It was cold, for one thing, and I am really chill-phobic. Secondly, I hated it for all the reasons that Eben loved it. It was dark and removed from everything else in the house. And I'm lazier than I thought I was because I just didn't feel like heading downstairs every time I felt an artistic urge.

So once it became apparent that Eben's visit to the Cape was going to be of the more extended variety, I decided to swap his room and my sewing room. It bothered me that his bedroom was just sitting their like a museum room that needed dusting. So, after gathering my energy and Jamie's, we made the switch.


I. Love. It. Lotsa, lotsa. For the first time in my sewing life, I have room for everything to be out and accessible. I even have two lovely windows that seem to be filled with birds. It's nice and toasty, both of my sewing machines are set up and ready at all times, and I have plenty of space for my design wall. I spend way too much time in here now, even when I'm not working on anything. It just makes me feel good to be here. And when Eben visits, he gets the dark-teenager-angst room he was wanting, so we both win.


Karmann Ghia: "Gone but Not Forgotton"

I have never been into cars. They just don't do it for me. I mean, I do love a good heated leather seat, and can totally appreciate how some of them are fun to drive. But for me, they're just a means to a destination. If the heater works, if the ride is comfy...I'm cool.
 
Exception: I love me some VW Karmann Ghia's. This is a pic of the 1971 Ghia I owned up until recently:
 
 
After a few years of owning a classic car, I can say with certainty that it is better to look at them than it is to own them. I would drive it, perfectly healthy, into the garage. Two days later, I would come out to find it dead for some reason or another. It got to the point that it was pissing me off more than anything, so I decided it was time to sell it. $3000 in mechanical work later, I drive to the appraiser's. I was happy to discover that it was valued at just over $14,000 and drove out of their parking lot feeling pretty good about myself and the car.
 
Less than one mile from the appraiser's, and only a few blocks from my house, an elderly woman ran a stop sign and hit me. Minor damage...huge cost. I will keep the long story of what followed (and therefore, the cursing) to a minimum level. Suffice it to say that an insurance battle followed and a buttload of frustration. At the end of it all, I decided to just sell it "as is" to some guy who thought he was sharking me. I let him think that, but I know he got it for a dream. I just needed to be done with it. I needed it gone.
 
I don't miss it like I thought I would. But I still think they're beautiful. They're sexy, they're funky. And they make perfect subject matter for pictorial quilts:
 
 
 This is a shot of it when I thought it was done. Thread lines with free motion quilting, as usual, and then I added in some pencils and some paint. For some reason, this piece just wanted to appear cartoon-y, so I went with it.

 Detail of the car.


But once again the blank space bothered me. The road was just too big and shiny. Because I'm a sucker for punishment, I decided to add in some texture to the road...a sort of rocky, cobblestone look. These little circles don't seem like much, but they take forever. I'm glad I took the time, though, because it's much more eye-catching this way. I haven't hung it on the wall yet (it's still on my design board) but I often find my eye wandering over to it now that the texture is on the road:
 
 "Gone but Not Forgotton"

Nekkid

Finally, this blog has entered the current year of 2013. I'm almost caught up on my projects (the ones I have pictures of, anyway) and will soon be able to dial down the posting and crank up the crafting.

This post is pretty basic. I wanted to experiment with a couple of nudes. The female form has such wonderful lines and curves and I wanted to see how that would translate into free motion quilting.

"A Simple Girl"
 
I didn't do much in the way of fancy for this lady. No paint, no pencils...just lines with thread. I jazzed it up by using metallic thread for her hair and her robe, but that's it. I like the way she turned out, but my fiance thinks I should have included a butt crack. Heh. 
 

"Untitled Nude"
 
This is postcard sized, and nothing special. I like the lines, added some paint, but otherwise feel pretty "meh" about it. I like it enough to keep it around, but not enough to actually bind it.
 
I do have one more in the series that is very fetching except for the fact that her nipples are pointing in different directions. Highly distracting, that. The lines are done in thread, but I haven't gone any further just yet. I'm probably going to fool around and see if painting or quilting can give her some artistic plastic surgery. If not, she'll probably hit the scrap heap...beauty is so fickle. 

Girl With a Pearl Earring


Another project inspired by a Craftsy.com class (Lola Jenkins)...this one is my take on the Girl With a Pearl Earring:


For those of you who don't already know, this a variation of what is often considered to be Dutch painter Johannes Vermeer's masterpiece painting:


Yeah, yeah, also a book and a movie. I know.
 
This is another piece, much like the Flowering Desert, that represents a turning point in my fabrical creations. In this one, I learned how to use colored pencils on fabric, which is honestly something I never would have thought would work. I would say that this piece is the one that I most enjoyed doing...using the pencils to blend color more precisely than I could with paint was hugely rewarding.
 
The class taught me a bit about the importance of shading. I am not an art student, so this obvious bit of info was something I needed to learn. When you work on a piece, you're so close up to it that you forget, well, I forget, that consideration needs to be given for what it looks like from a distance as well. The shading causes a much more vibrant piece; much more depth. The veteran artists reading this will say, "Well, DUH," but talent for me was not downloaded Matrix-style into my head...I had to actually learn these things. ;^)
 
"I know kung-fu...er, art stuff!" 
 
As you can see in the picture below, the smallest bit of shadow under her cap, eye lids and cheek bones added much needed dimension. Within the lips and eyes, I added layers of colors and lines that are hard to detect from a distance, but wonderful detail to see when you're looking closely. Another cool trick learned from Lola Jenkins is to use a White Out Pen or Liquid Paper Correction Pen to make white dots on the eye. For such a little thing, it makes a huge difference on the piece. Another thing I did was to use a Pigma Micron 05 Pen to accentuate the black thread lines. After you use the colored pencils, the black can get washed out a bit and the pen helps it pop again.


For once, I remembered to take pics of the progress. I have a tendency to become so immersed in my project that I forget to do things like this, and I really need to get on that because it's fun to go back and see how it developed.
 
I started with the line drawing in thread, using free motion quilting. The face came next. I did the face first because it was the most difficult and I prefer to make my mistakes early on before too much work has been done (if possible). If only I followed that rule in life as well.
 
 
Next came the coloring of the cap, which was FUN! I use Prismacolor Pencils and the shades are wonderfully vibrant and rich. Perfect for blending. It would have been near impossible to screw this part up, as it's pretty easy to blend mistakes away or simply color over them. 


I used a lot of shading and color in the robe as well, although it's difficult to see in this picture. Just small bits of color that you can see when you're close up. I decided to make her robe in the gray scale to draw more attention to everything above the neck. (For the record, that doesn't seem to work quite as well when I wear grey shirts: The bittersweet aspect of weight gain is big boobs.)
  
Once the girl was done, I sat around mentally wringing my hands over what to do with the empty space of the background. Had I used a more interesting fabric, I suppose it could have stood on its own, but as it was, it bored me.
 
Despite the work that went into this Girl, it was really supposed to be a learning piece. So I ultimately decided that's what it would remain, and I got funky with some more free motion quilting. First came the straight lines as shown above. They weren't enough. So I just had to go and get nutty:


I don't have a name for the circular design I wound up adding in. My father said they looked like oysters, so I guess that's as good of a name as any. After the quilting was done, I posted some pics on Facebook to see what people thought about the background. The response was 50/50, so no help there. But what was done was done and I hung it on the wall. After sitting with it for a few months, I've decided that I like it.
 
Here's the finished product:


Thursday, January 31, 2013

The Big Bad: Guitar Quilt


I've been blogging my little heart out because I want to get caught up to what I'm currently doing. After this post, however, I may need to take a little break for some beer R&R. This one's going to be a doozy, because it is the most complicated project I have ever taken on. I still can't believe that I did this.

For scale


Background: I come from a musical family. My father is a blues guitarist and song writer and my son, Eben, has shown an astonishing aptitude for guitar that is sometimes frightening to me. My uncle plays guitar (and is an amazing painter, as well...just to give props), and my fiance is a fantastical guitarist as well. My step mother plays the piano, and is now taking guitar lessons. Countless friends are musicians as well.

So to give proper respect to the role music plays in the lives of those I love (I can't play anything beyond basic piano), I decided that I would do a guitar quilt. And again, I jumped head first into something that was really out of my league. It's a blessing and a curse; this damn quilt ate my life for awhile.

It all started with a Google image search for "guitar quilt" to get some ideas. Eventually I found a quilt Robbi Eklow did called "Groovy Guitars" and after that, everything went nuts.


It may not seem like it, but drawing out these pieces and cutting them and laying them out so they match and overlap properly...uhg. Took forever. It's like putting a jigsaw puzzle together with floppy, wiggly pieces and then trying to pin them to a wall.


Next came cutting out the individual pieces in both fabric and fusible interfacing. Then I got to do the whole jigsaw puzzle thing all over again. To keep them in place, I used masking tape and very gingerly ironed the whole thing. Gingerly, because the slightest shift in a single piece would throw off the whole thing. Wow, writing this out makes it seem like it was so easy and in reality it was a frustrating hell. But I do love a good challenge and I wasn't going to let this best me. Truthfully, this was the hardest part. Once I got everything ironed on and in place, it became a lot more fun.


 I free motion quilted patterns in the guitars which would give it some texture after it was painted and embellished. Stupid Blogger isn't letting me make this pic bigger for some reason, so I hate them at the moment. Oh well. You get the idea.


From here on out, I got to play with quilting and painting. Here are some pics of the progress:


So that's it. A huge amount of work encapsulated into a blog post. I am so glad that I did it. And I am so glad that I'm done.